Only one MRM can be installed in a Wave. These instructions apply for all MRM models (A, B, C). This instruction set only applies for ISC3 2500.
- Unplug the Wave Server’s power cord, but do not disconnect the grounding wire.
- Remove the ISC (see Remove Wave IP 2500 ISC).
- Turn the ISC over and set it down on an anti-static mat. You will see a space outlined for the MRM with 4 standoffs. There will also be a blue ribbon cable connector.
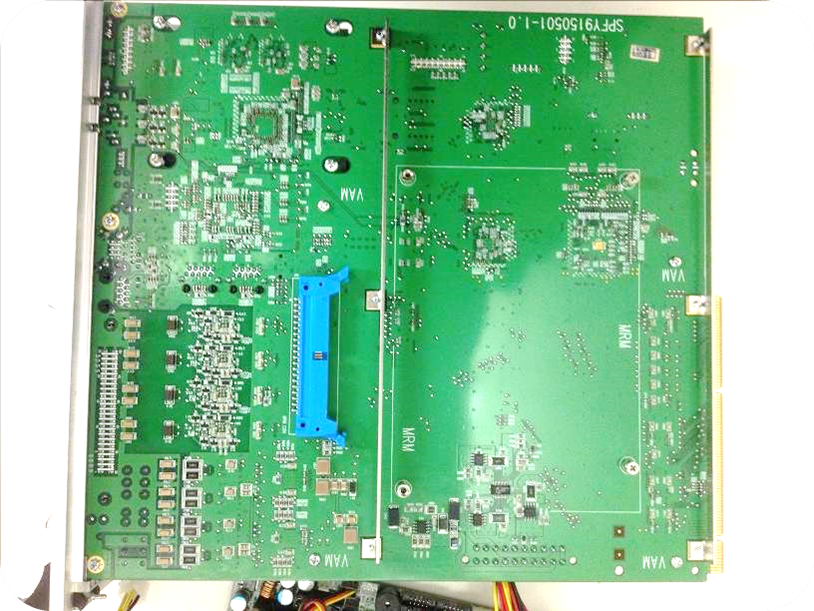
- Align the MRM over the standoffs. The ribbon cable coming out of the card will be away from the ISC.
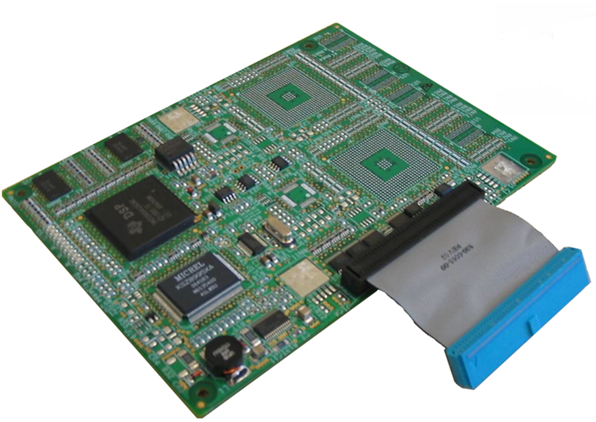
- Fasten the 4 retention screws in the corner holes to attach the MRM to the ISC. Plug the MRM ribbon connector into connector P2 (the light-blue 40-pin socket) on the ISC2.
- Turn the ISC over and reinstall into the Wave (see Install ISC).
- You can verify the MRM is correctly installed by logging in to Global Administrator (see Log in to GA) and very under IP Network Settings that the MRM is appearing. You will need to enter an IP address or address for the new MRM (one for MRM-A, two for MRM-B, three for MRM-C.)
