- Login to the RAS PC with an administrator account.
- Click Start and open the Vertical Recording Archive Service Manager.
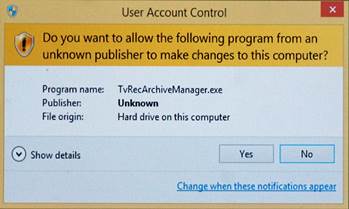
- A UAC dialog will appear. Click Yes to proceed.
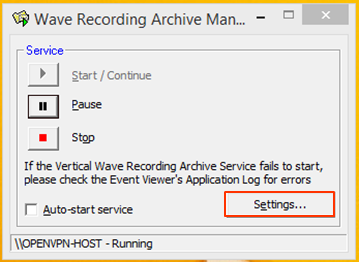
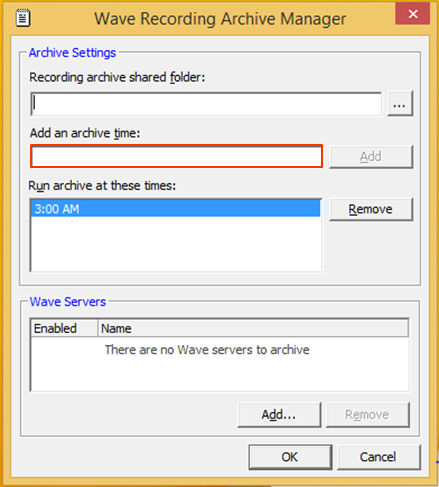
- The Recording Archive Manager launches. Click on the Settings button to configure.
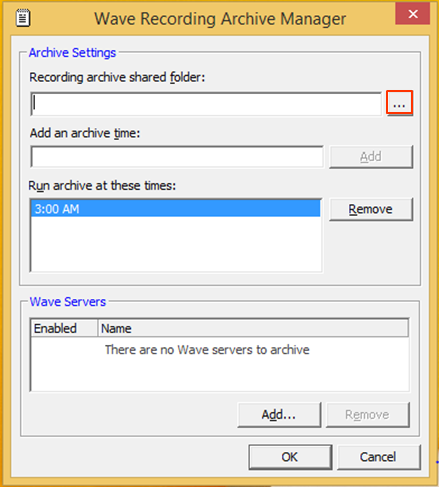
- The first step is to enter information on the archive folder location (see Create a shared network folder). Click the ... button to set the shared folder location.
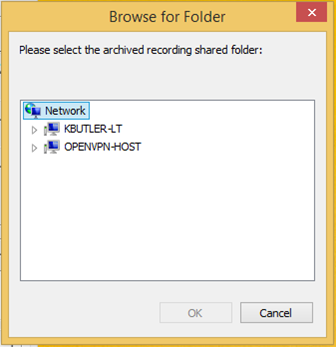
- Available network PCs are displayed. Click the triangle next to the PC hosting the shared folder and the shared folder name should be displayed. Click on it to select and then choose OK.
- The system is set to archive at 3:00 am. Alternate or additional times can be added as needed by entering the time and the clicking Add. Click Remove to eliminate unwanted archive times.
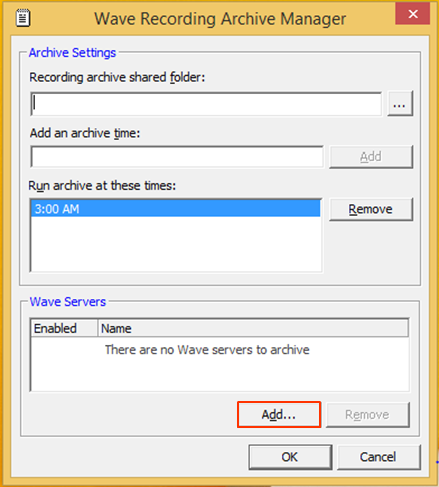
- Add the Wave server (or servers) that will use this Recording Archive Service by clicking the Add button.
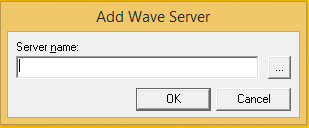
- Enter the hostname or IP address in the Wave Name field and click OK.
- Click OK on the main settings page to apply settings.
- It is recommended to engage the auto-start setting to ensure the Archive Service runs when the PC is rebooted.
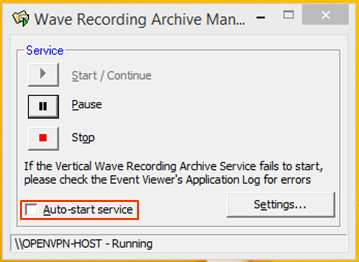
- Click the X in the top-right to close the Manager.
-
-
- Wave Initial Configuration Process
- Use the Configuration Worksheet
- Install an MRM on an ISC3 Wave IP 2500.
- Remove Wave IP 2500 ISC tray
- Install ISC in Wave IP 2500
- Add EXUs
- Install Expansion Cards
- Install MRM on an ISC3 Wave IP 500
- Configure Client Computer's Internet Explorer To Allow GA Login
- Set IP Network Settings
- Use Vertical Updates
- Manual Software Install
- Required Company Settings
- Add Licenses to Wave
- Import License File
- Manually Add License Key
- Activate Wave Licenses
- Use One-Click Activation of Software Licenses
- Use Off-Line Activation of Software Licenses
- Set Wave System Time Zone
- Set Resource Management
- Set Up Trunks
- Add a SIP Trunk (SCP)
- Configure Trunk Groups
- Configure Inbound Routing Table
- Add Analog Trunks
- Import Users
- Add Auto Attendants
- Trunk Configuration
- Add Digital Trunks
- Set Up Emergency Alert
- Configure Special Digits
- Set Up Emergency Caller ID
- Configure Outbound Routing Tables
- Copy User Templates
- Outbound Trunking Quick-Start
- Select the First Digit for External Dial
- Set the Home Area Code
- Configure Inbound Survey IVR
-
- OpenVPN Server- START HERE
- OpenVPN Server Requirements
- Install OpenVPN Server Virtual Machine (VM)
- Configure Vertical OpenVPN: Off-Wave
- Set OpenVPN Server IP Address
- Configure the Network to Support OpenVPN Server
- Configure VPN Phones using Wave IP for Vertical OpenVPN: Off-Wave
- Configure VPN Phones using Wave IP for OpenVPN: Custom Deployment
- Install OpenVPN Server Virtual Machine (VM) on Hyper-V
-
- Edge IP 9830
- Edge IP 9820
- Edge IP 9840C
- Edge 700 24 Button
- Edge 700 8 Button
- IP Phones
- Spectralink Wireless 8400 Series
- Polycom VVX 600
- Polycom VVX 500
- Polycom VVX 400
- Polycom VVX 300
- Digital Phones
- Polycom Soundstation IP Conference Phones
- Edge IP 9800 Phone Features
- Custom Configuration Files for Edge IP 9800 Series Phones
- Set Custom Time Zone on Remote Edge 9800 series Phones
- Add a Custom Background Image to an Edge IP 9840C Phone
- Find the IP Address of a 9800 Series Phone
- Default a 9800 Series Phone
- Initially Configure an Edge 9800 IP phone.
- Making Calls on the Edge IP 9800 Series Phone
- Receiving Calls on the Edge IP 9800 Series Phone
- Edge IP 9800 Series Phone Display Buttons
- Edge IP 9800 Series Fixed Phone Buttons
- Log In to Edge IP 9800 Series Phone
- Edge IP 9800 Phone Instructions
- Edge IP 9802
- Call Waiting (Edge IP 9800 Phone)
- End Call (Edge IP 9800 Phone)
- Hold Call (Edge IP 9800 Phone)
- Transfer Call (Edge IP 9800 Phone)
- Forward Call (Edge IP 9800 Phone)
- Conference (Edge IP 9800 Phone)
- Last Number Redial (Edge IP 9800 Phone)
- Do Not Disturb (Edge IP 9800 Phone)
- Mute Call (Edge IP 9800 Phone)
- Speed Dial (Edge IP 9800 Phone)
- Call Log (Edge IP 9800 Phone)
- Wave Phonebooks (Edge IP 9800 Phone)
- Retrieve Parked Call (Edge IP 9800 Phone)
- Voice Messages (Edge IP 9800 Phone)
-
- How to Gather Logs
- Certified Third Party IP phone is not receiving System Page, *11
- Recording Archive Server (RAS) Instance Won't Remove from Wave IP
-
-
- Digital Phone DTMF Sometimes Fail on Calls
- Edit the Windows Registry
- Changing The Extension On The Edge IP 9800 Series Phone Doesn't Work
- Vertical Updates Fails to Check for Updates
- Cannot Login to Global Administrator And Get Java Warning bar
- Logging In To Global Administrator Results In A Blank Page
- Voice Server IVR Plays Message That IVR Is "Unlicensed" And "Not For Commerical Use"
- OpenVPN Does Not Fully Configure From Wave IP In Off Wave mode
- Default Music On Hold Files Are Reported As Too Loud
- Issues getting more than 63 OpenVPN phones connected successfully.
- 9800 series phones using OpenVPN always use source port UDP 1194.
- OpenVPN server (CentOS 7): client devices are pulling VPN addresses outside of the defined DHCP Address Range.
- OpenVPN server: Identifying / verifying certificate files on the Wave and OpenVPN server.
- Wave 7.0: IP phones are not registering on new install or after migration.
- Wave 7.0: Hunt Group No Answer forwarding
- ViewPoint: TAPI configuration freezing during install (field reported issue)
- My Phone Number Is Coming Up Listed As SPAM On A Phone Carrier
- Polycom VVX 500 or VVX 600 - 20 second audio delay to external party
- Recover Java on Wave to the originally shipped version.
-
- Login to User/Group Management
- GA Login
- Login to OpenVPN Server
- View License Status
- Login to System Desktop
- Failover using Business Continuity Service (BCS)
- Using the verbal account code prompt instead of a beep
- Transfer Files To And From Wave IP
- Restoring Wave from Backup
- Access a Wave Network Share
- Synch Wave Time
- Change LLDP-MED settings for All IP Phones
- Resize Disk Drive Partitions On The Wave
- Add Public ViewPoint Groups
- Set Music On Hold Files
- Recover BCS- Keeping Secondary System Active
- Recover BCS- Restoring Primary to Service
- Backup a Wave IP
- Set 'Log on As A Service'
- Set Permission To Wave IP Buffer folder
- Add a Global Administrator User
- Set Global Administrator user Access Permissions
- Create A Shared Network Folder
- Set Voice for Text to Speech (TTS) In IVR
- Assign Ports For Outbound IVR Use
- Create An Application Hunt Group
- Build IVR Prompt
- Add IVR Questions
- Extend Wave's C drive via GHF
- Update IODD Recovery drive to extend Wave's C drive during system imaging.
- Determining the source of 911 calls.
-
- Emergency Numbers
- Recording Archive Service (RAS) Overview
- Wave Backup Content
- OpenVPN Server Overview
- Choosing OpenVPN Server Method
- Business Continuity Service (BCS) Overview
- Choosing BCS Recovery Method
- Inbound IVR and Caller ID
- Impact of Internet Explorer retirement on Vertical Wave IP systems.
- Using Remote Desktop to Connect to the Wave Server
-
- Wave Lifecycle Announcement- 1/31/24
- Wave IP Manual
- Wave 7.0: Global Admin applets using RDP
- New Release: Android ViewPoint Mobile 3.0
- Introducing Summit2400!
Initially Configure The Recording Archive Manager
Last Modified on 11/03/2015 1:51 pm EST


