Outbound Routing Tables are the final step for calls heading out a trunk. Outbound Routing Tables are used in a number of locations as the last step. This includes the various tables in the Global Access Profile, User Access Profiles, Private Network Settings, and First-Digit Table External options. In all of these cases, the Outbound Routing Table configuration options are the same and the list of routing tables is the same.
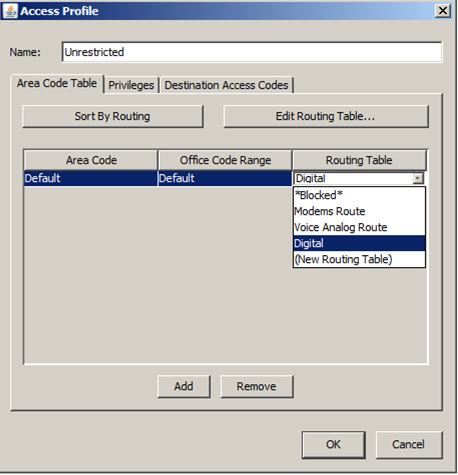
- Access the Outbound Routing Table from one of the above locations. It should have a column labeled Routing Table. Click on the box to access a dropdown list of existing routing tables. There is an additional option for (New Routing Table) used to create a new routing table.
NOTE: The Special Digits Table (under Outbound Routing>Global Access Profile) has an additional option, Redirected -->. This option is not seen on any other routing table lists. It is unique (see Configure Special Digits).
- To edit any existing routing table, select it and then click the Edit Routing Table button.
- A routing table always needs a Name to uniquely identify it.

- Click Add to create a routing table step.
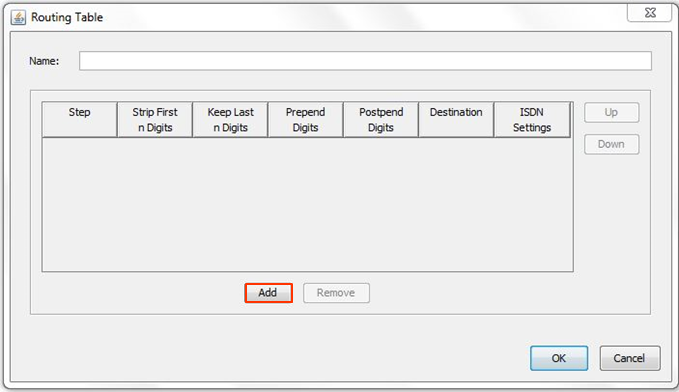
- Each step has a number of possible settings including:
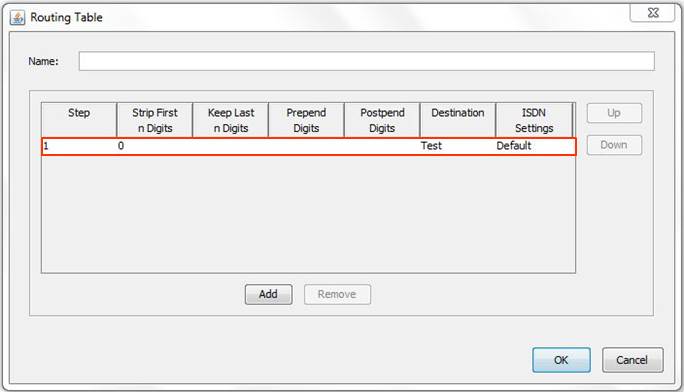
- Strip First n Digits- Enter the number of digits, if any, that you want to strip from the beginning of the outgoing telephone number.
NOTE: The external access code digit (for example, 9) does not need to be stripped. It is not included in any call routing decisions after the call type is determined. - Keep Last n Digits- Enter the number of digits, if any, that you want to keep at the end of the outgoing telephone number.
NOTE: For a particular route step, you can enter a value into either the Strip First Digits or Keep Last Digits field. Entering 0 for Strip First Digits will not remove any digits. Entering 0 for Keep Last Digits will remove all the digits. - Prepend Digits- Enter the digits that you want to add to the beginning of the outgoingt telephone number.
- Postpend Digits- Enter the digits that you want to add to the end of the outgoing telephone number.
- Destination- Select a destination trunk group (or Signaling Control Point for IP telephony) from the drop-down list. (Signaling Control Points have the following format: IP|Signaling Control Point name).
- ISDN Settings- If you selected a trunk group that is associated with an ISDN trunk in the Trunk Configuration applet, you can select an ISDN setting from the drop-down list. If you do not select a trunk group that is associated with an ISDN trunk, this field
is disabled.
- Strip First n Digits- Enter the number of digits, if any, that you want to strip from the beginning of the outgoing telephone number.
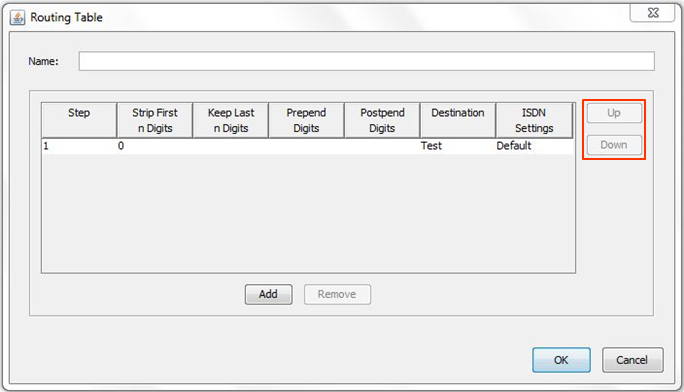
- Add additional steps if desired. Multiple steps can be used to create trunk failover. The system tries the first step, if the call rings busy or fails, then the next step will be tried. The dial string is reset if the call proceeds to the next step (all digit stripping and additions are removed). The call will process through all steps until it succeeds or no stops are left. The call will not leave the routing table.
NOTE: The call will not proceed to the next step if the trunks the report is answered no matter what then happens (for example, if another PBX answers the call, but then hangs up based on its' routing. Wave IP has to consider that a successful call.)
- Use the Up and Down arrows to the right to change the order of steps.
- Press Okay to save changes. Make sure this routing table is selected in the drop-down.


